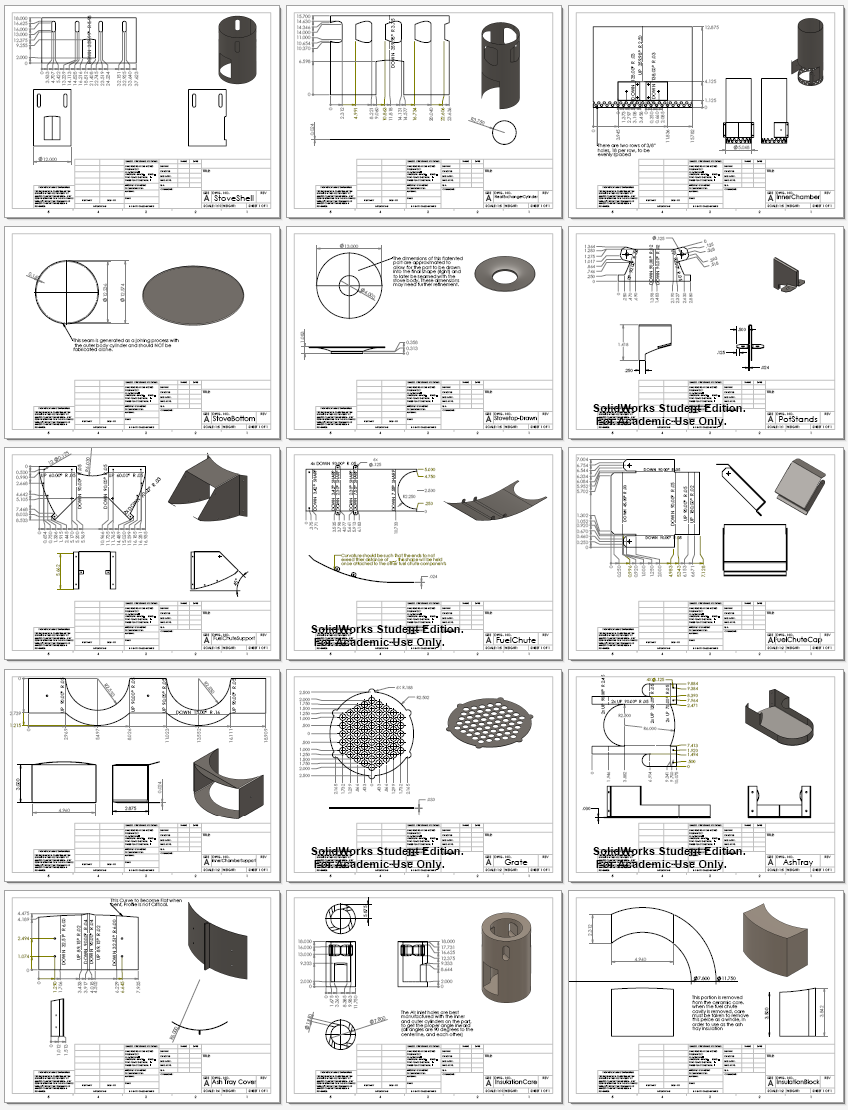

Final Design
The final design utilizes the idea of a heat exchanger. Cool ambient air enters the cut slots near the top of the stove. The air swirls around the combustion chamber which heats up and dries the air. The heated and pre-dried air enters the combustion chamber from under the fire which creates a hotter burn that is consequently more effiecient. Three prototypes were created in total and can be seen in the image below.
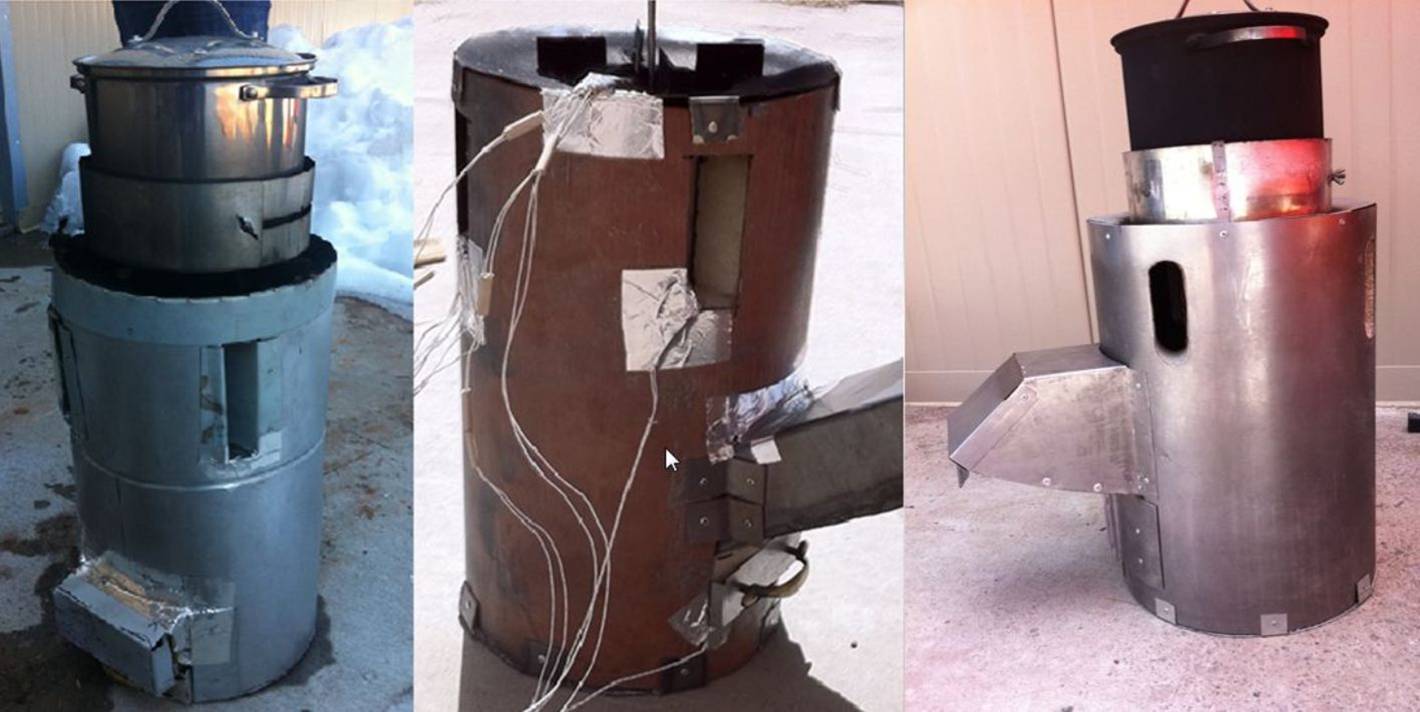
The first prototype was built to confirm the functionality of the idea. Based off this prototype and its deficiencies, prototype two was created. This prototype was used to test fuel consumption, thermal behavior and its ability to cook food. From prototype two, slight modifications were made to increase safety. Prototype three is the final product that will theoretically be mass produced.
For the first prototype, the insulation used was a vermiculite and loose fill fire retardant aggregate mixture. The team decided that this
was not only inefficient, but also difficult to contain within the relatively large tolerances between the sheet metal, so it was decided to build a new type of insulation.
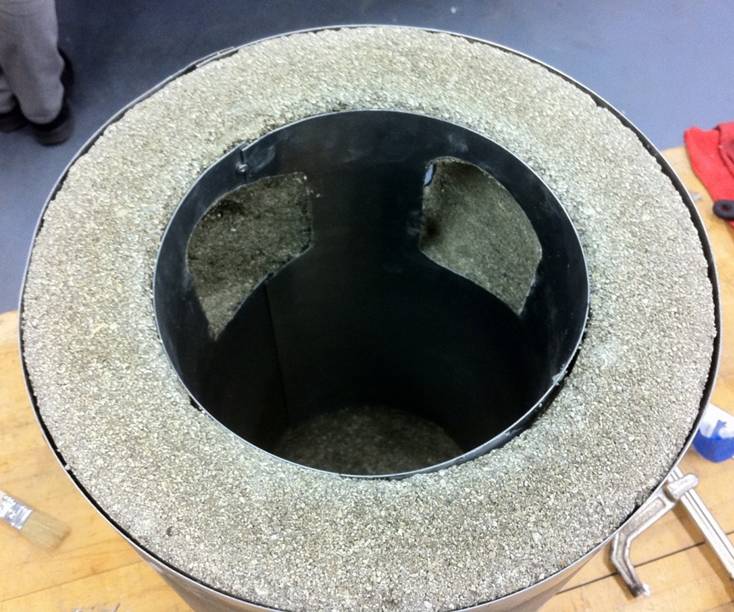 The new insulation is made up of 75% vermiculite and 25% sand/cement/water combination and allowed to dry for four days. Once dried, the insulation was put into place and the remaining parts of the stove were assembled around the core.
Multiple tests were conducted on the protypes as well as some flow simulations done with the aid of Solidworks. The Simulations allowed us to visualize how the stove should function as well as validate the heat exchanger concept. Fortunately the Solidworks simulation proved that the draft force from the combustion would indeed be enough to pull intake air from the higher air inlets of the stove. While the Solidworks
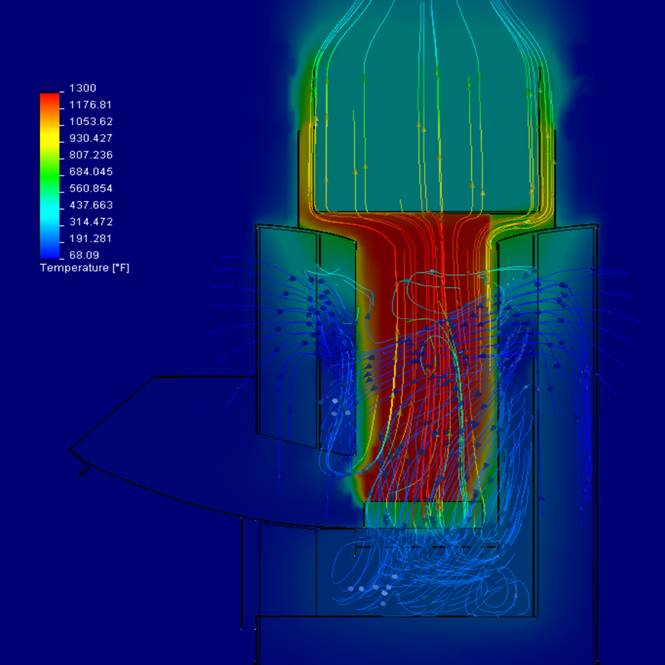 showed us that the concept should work, multiple tests had to be conducted in order to validate the simulations. The first of many tests involved not only usability tests but also fuel consuption and ash ratio tests. The preliminary results of these tests were promising as the stove was both easy to light and use, but also demostrated a low fuel to ash ratio which the team interperated as a sign of high effieciency. Enthusiastically the team pushed to complete the second prototype and begin a more thorough analysis of the stove. The second round of tests consisted largly of gathering temparature data to varify that the heat exchanger part of the stove was indeed pre-heating the incoming air prior to combustion. A simple virtual instument was setup using LabView, a visual programing aid that allowed for the monitoring and recording of multiple thermocouple outputs. In all, a total of 6 thermocouples were placed at various locations within the stove and transient and steady state data was collected. The results of the test again showed promising results.
 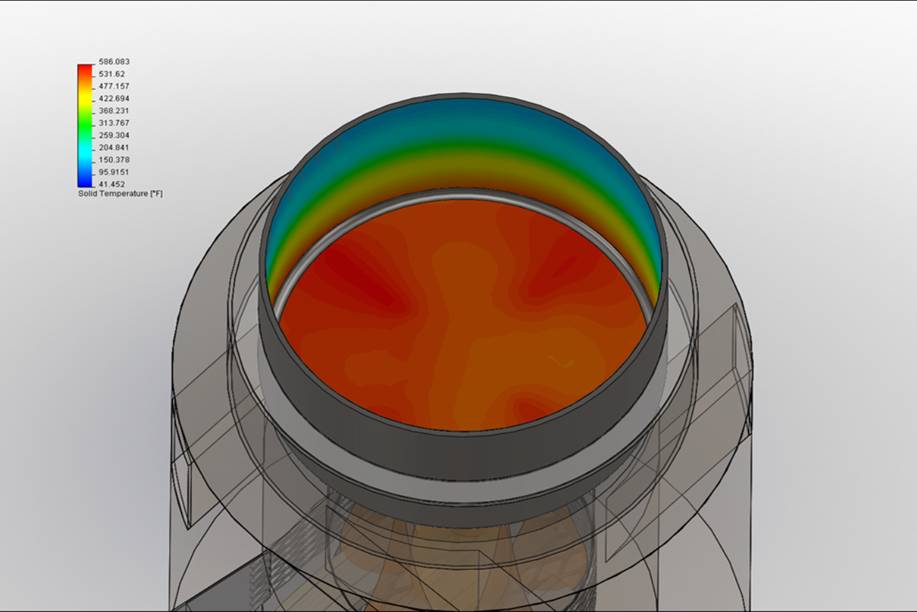 The tests not only verified the flow simulations we had done, but also showed us results that were even better than expected. According to the collected data, the heat exchanger was pre-heating air about 200 degrees Ferenheit above ambient, about 100 degrees more than anticipated. In addition to the thermocouple data, an infra-red temperature gun was used to measure surface temps at verious locations of the pot including the cooking surface. Once again the measurements validated the simulations we had done.
Conclusion
DIY
