Custom Attribute System Walkthrough
This walkthrough is intended the guide you through the process of settings up attributes and the groups that use them.
The following picture is of the Group Wrangler Home Page. This is where a user is directed to immediately after signing in.

Suppose we have our administrator, John Smith, who would like to set up a new group for students in the Engineering Department at his school who speak either Spanish or German. This site already tracks a user's language information, but not their department. So the first thing John must do is set up a new attribute.
John does this by clicking the site settings link, available to administrators in the lower section of the sidebar, located on the left of every Group Wrangler page.
Clicking on the link takes him to the site settings page, which is pictured below:
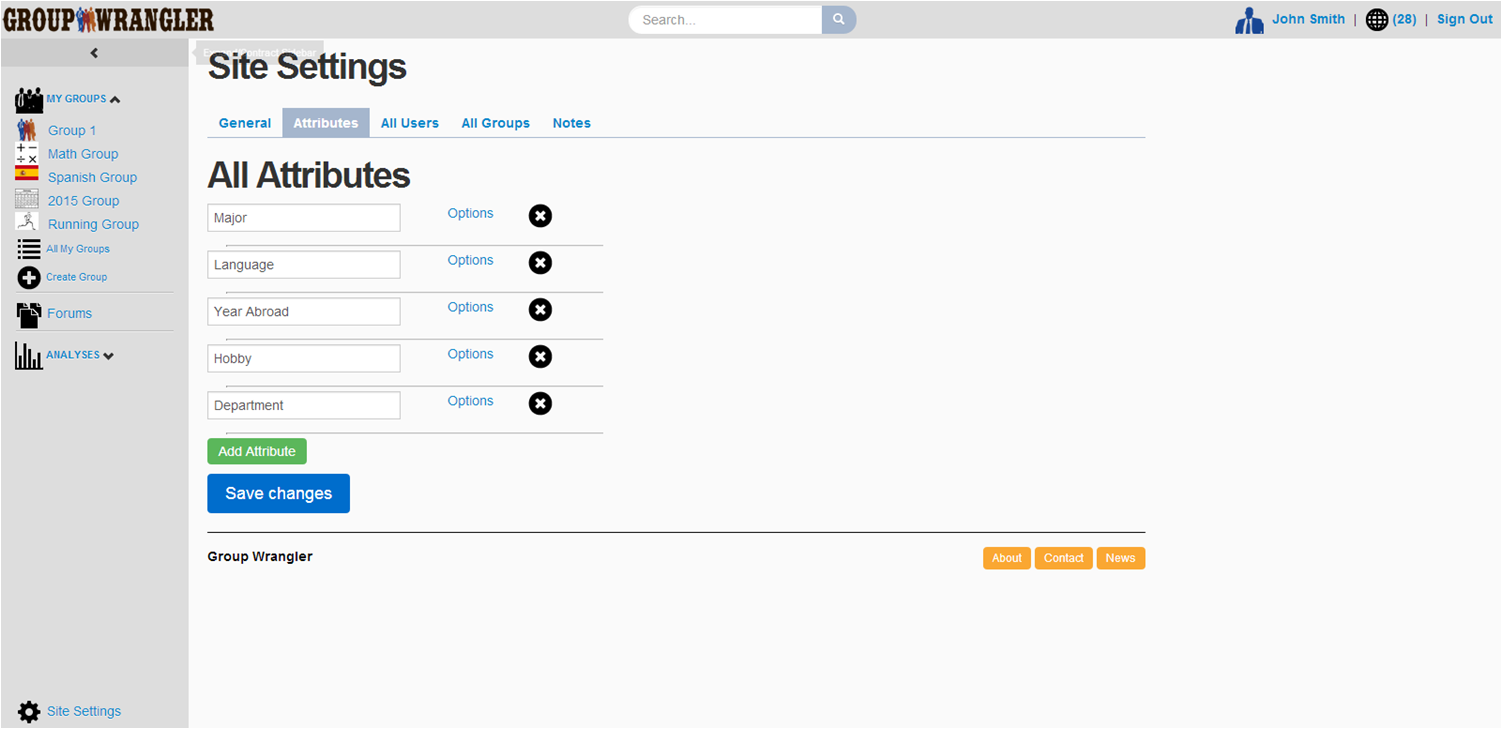
From here, John add a Department attribute, but he also wants to restrict the values a user can enter. By clicking the options link available for each attribute, John is presented with the following options:
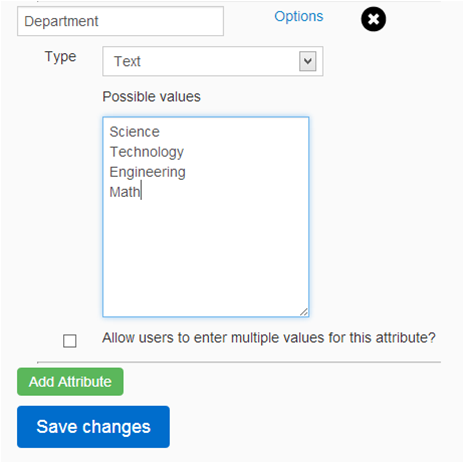
John enters the values he would like to allow users to choose from, and then saves the attributes. Now that the attributes are properly set up, John can now go ahead and create his group. He does this by clicking the create new group button located in the "My Groups" section of the sidebar. Clicking this button takes him to the group creation page, pictured below:
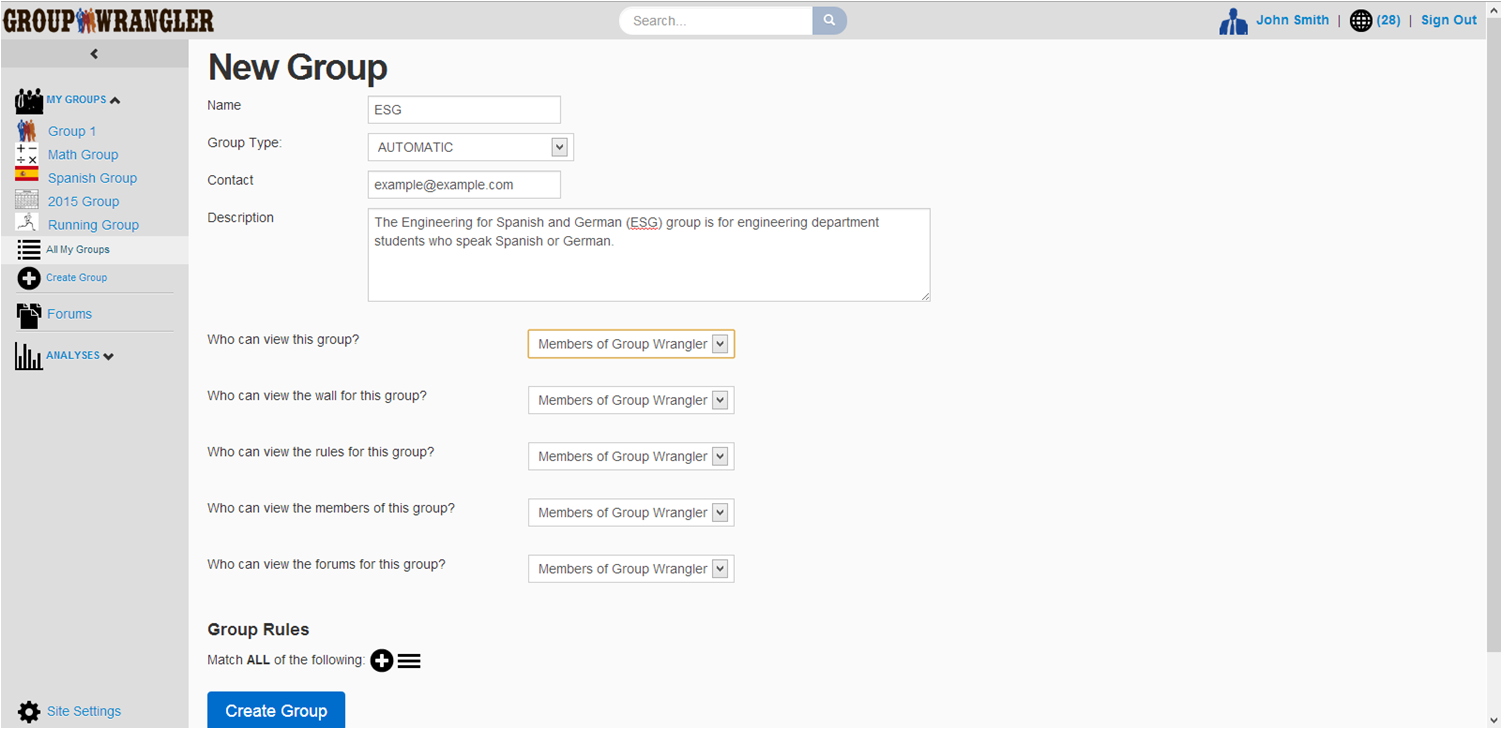
From here, John can fill out various options for a group such as name, description, contact information, and more. But for now, what he is interested in is settings up the requirements for being in the group. He does this in the rules section of group creation, pictured below:
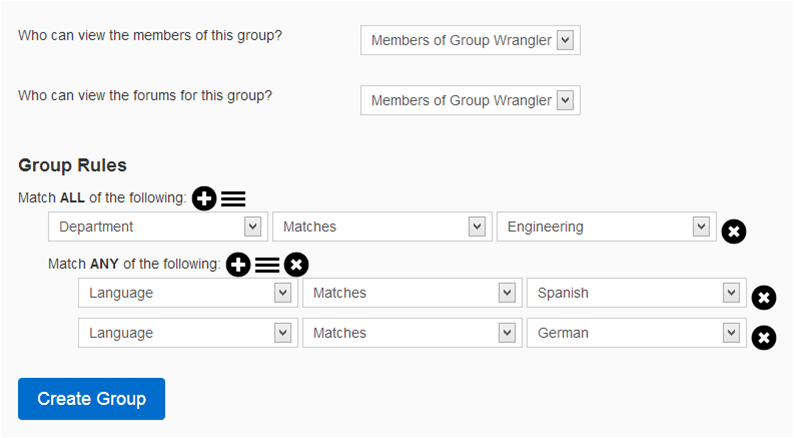
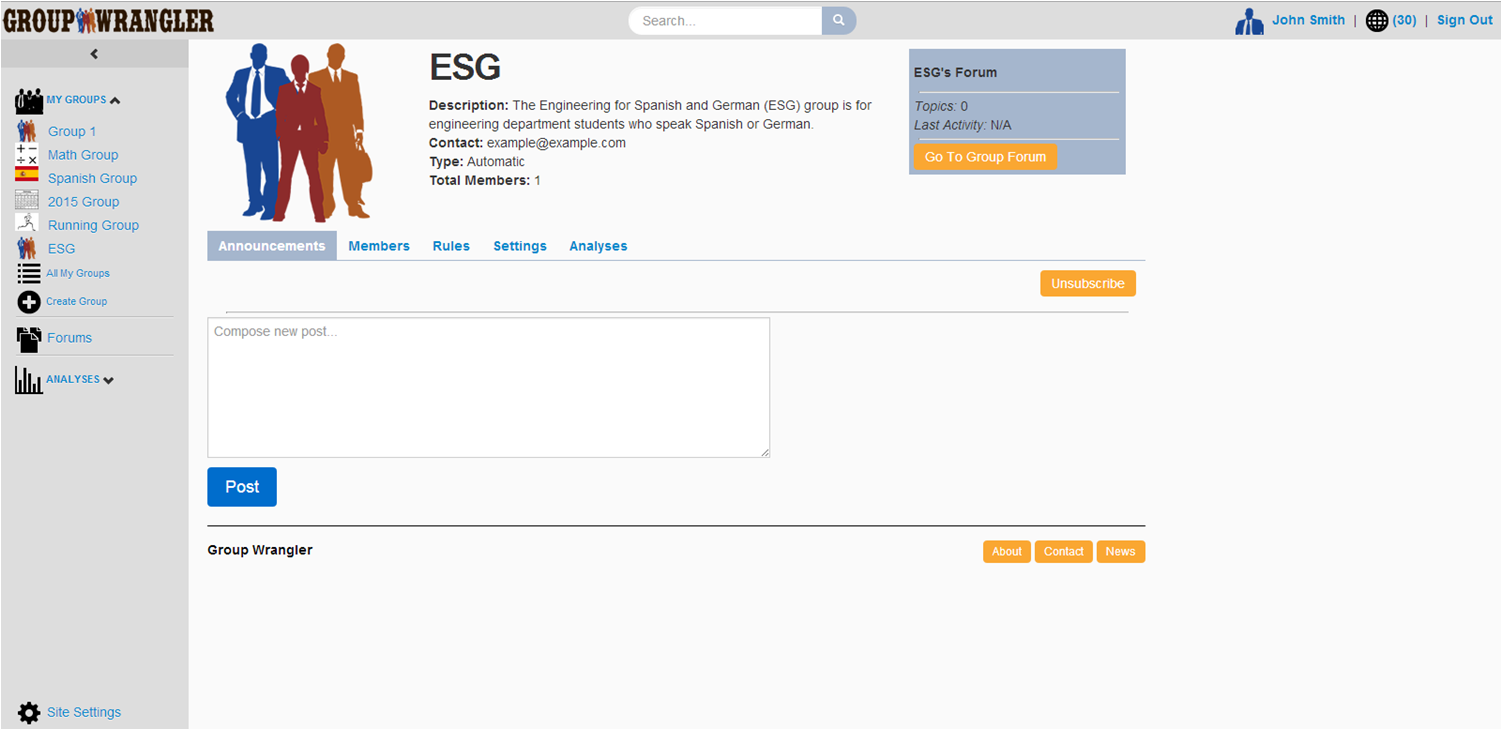
Here John has specified that to be in this group, a user must be a part of the Engineering Department AND speak either German OR Spanish. Once he is done setting up the group, clicking the create group button takes John to the newly created group's page, pictured below:
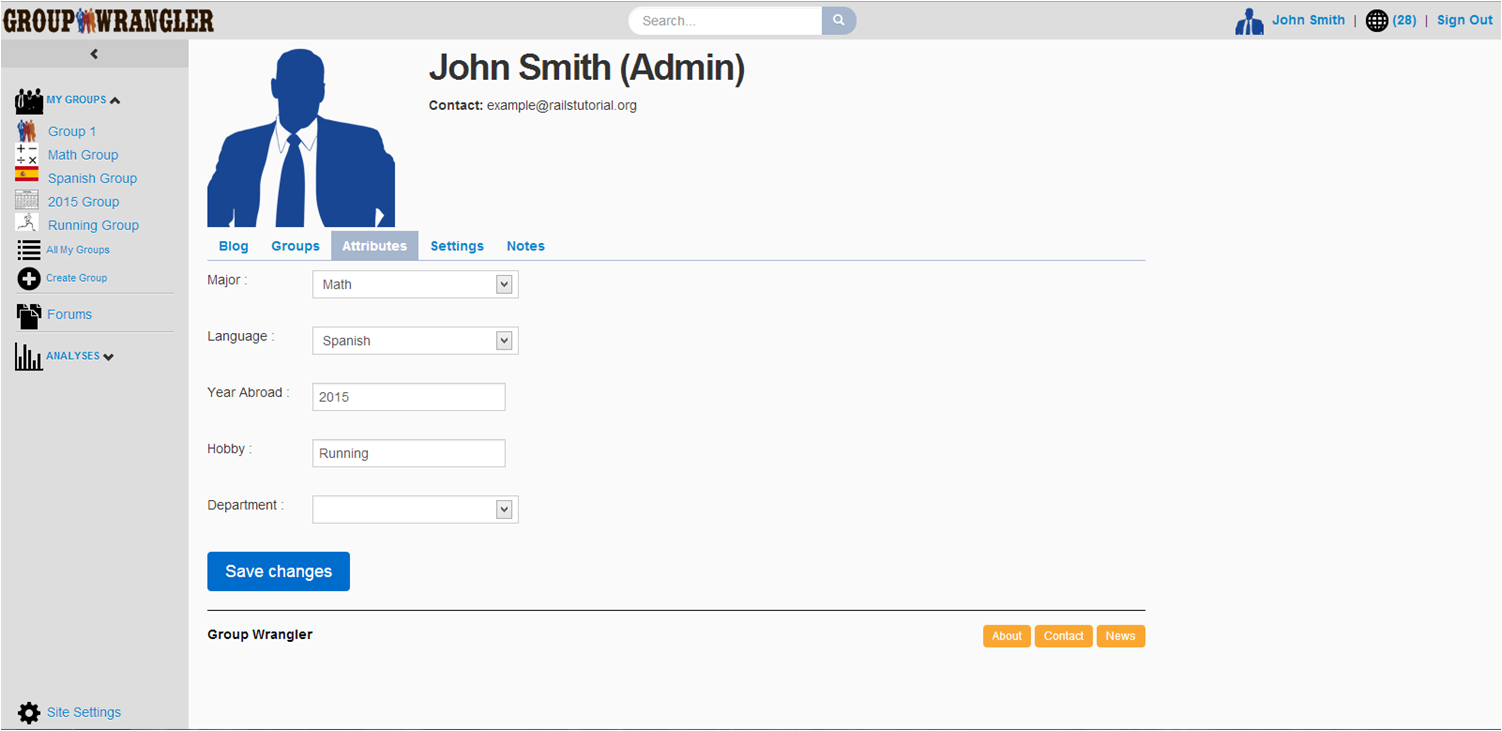
 Now that the group has been created, the last thing John wants to do is to add himself to the group. To do this, he navigates to his profile page, which is available through a link in the top right corner of each page. Below is pictured John's profile page, where he can now set his Department attribute to be Engineering.
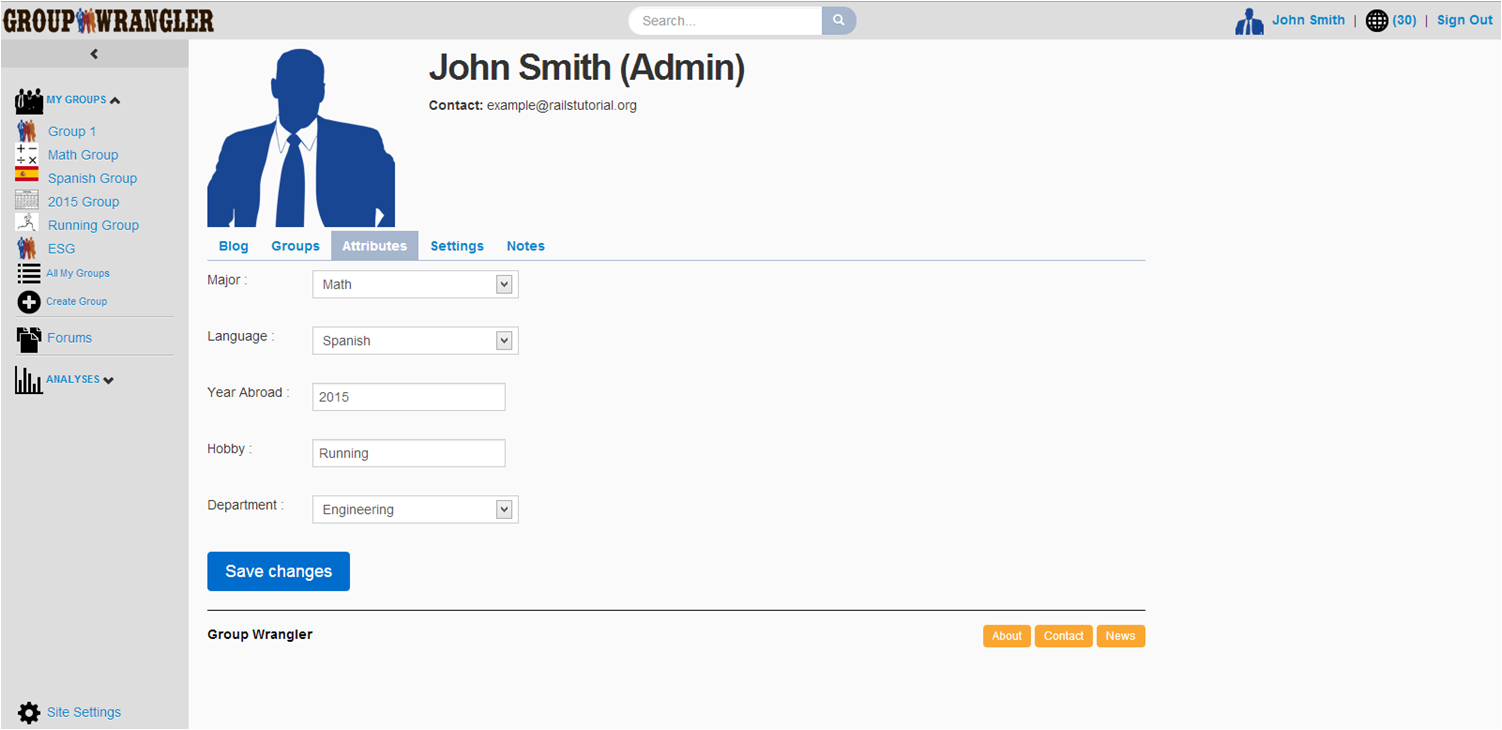
Since John already has his language set as Spanish, as soon as he saves his attribute changes, John is automatically added to the newly created ESG group and it can be seen as available in the "My Groups" section of his sidebar.
Hopefully this walkthrough has given you an idea of how the attrbute system available in Group Wrangler works. If you are interested in seeing more, there is a demo version of Group Wrangler available here on our website as well as the download for the full product:
Demo of Group Wrangle:
(Note: some features not available in demo version)
Download the full group wrangler product here:
